Adjusting A Cart – Part 1

As these days, we face new summits of cartridge price ranges and passionate debates on which cart performs in which way, it is time to discuss one of the most critical aspects of cartridge performance…..THE ADJUSTMENT!!!!!

It might be a nightmare for some high end cart users, if one day a real master of analogue vinyl reproduction would enter the listening room, which is packed with all the bells and whistles, and shows the proud owner that he can adjust an entry level cart to such a high degree, that it sounds better than what is available in this hypothetical Hifi paradise. Be aware that in the world of our stylus tracking the groove an error of one Millimeter is like a Kilometer from the stylus viewpoint…so precise adjustment means PRECISE ADJUSTMENT…which is not something that can be done while having an important meeting 20 minutes away and which can also not be done if our mobile phone is still switched on. Our pandemic times gives us some unknown resources which we can use to evolve to real analogue maniacs. Some of you might be surprised that sometimes it doesn’t require a new toy, instead we just need some hours of good concentrated work and the stuff we already have will blow us away! The difference of a mediocre adjusted tonearm and turntable in comparison which plays at the highest possible level is astonishing. Sometimes it is just a little move….imagine the azimuth is just 1° off and you will correct that….

You cannot believe what such a small move can do for the way the system is now able to render recorded space!


Get prepared:

To work in such small dimensions needs a lot of patience and some good tools. The first tip from my side would be to get some proper loupes normally used by watchmakers. These specially made tools can be fit into one eye so that you have both hands for working on your turntable. They also have the big advantage that they do not distort in such a heavy way – which is important if we want to judge if something is flush in a straight line. Another very important hint implies some feeling for delicate work: The next thing after a tight fit is no fit at all – so excessive force is not what a good analogue tech needs. A good adjustable light source would be the next thing on my list – because you can only adjust things which you can observe… the typical cosy dim light in our listening rooms is not sufficient!!! Besides proper tools like Allen keys, screwdrivers and a collection of high quality tweezers you should invest in a proper adjustment jig. Here we have to think about the geometry we want to adjust – because the jig depends on exactly that! If your record collection is 90% Pop and Rock you might decide to choose a different geometry than someone who is listening to big orchestral music which is normally cut very close to the label. For those classic listeners a Baerwald geometry would be a good starting point while Pop and Rock people would be better suited by something like Lofgren. A proper jig should have both geometries to choose from.


How to start?

Adjustment is done in a kind of circular form – because you cannot adjust each parameter at the same time – but a lot of them are dependant on each other. One little example: if we adjust the geometry as precisely as we can and some minutes later we adjust the VTA in a more drastic way than we thought – the geometry is off again…because the needle will now have a different position than before our VTA change. It is also a good idea to buy a very thin jig – because such a device can be placed on an old record – which helps us to do all the adjustments in exactly the plane the needle would track the groove…

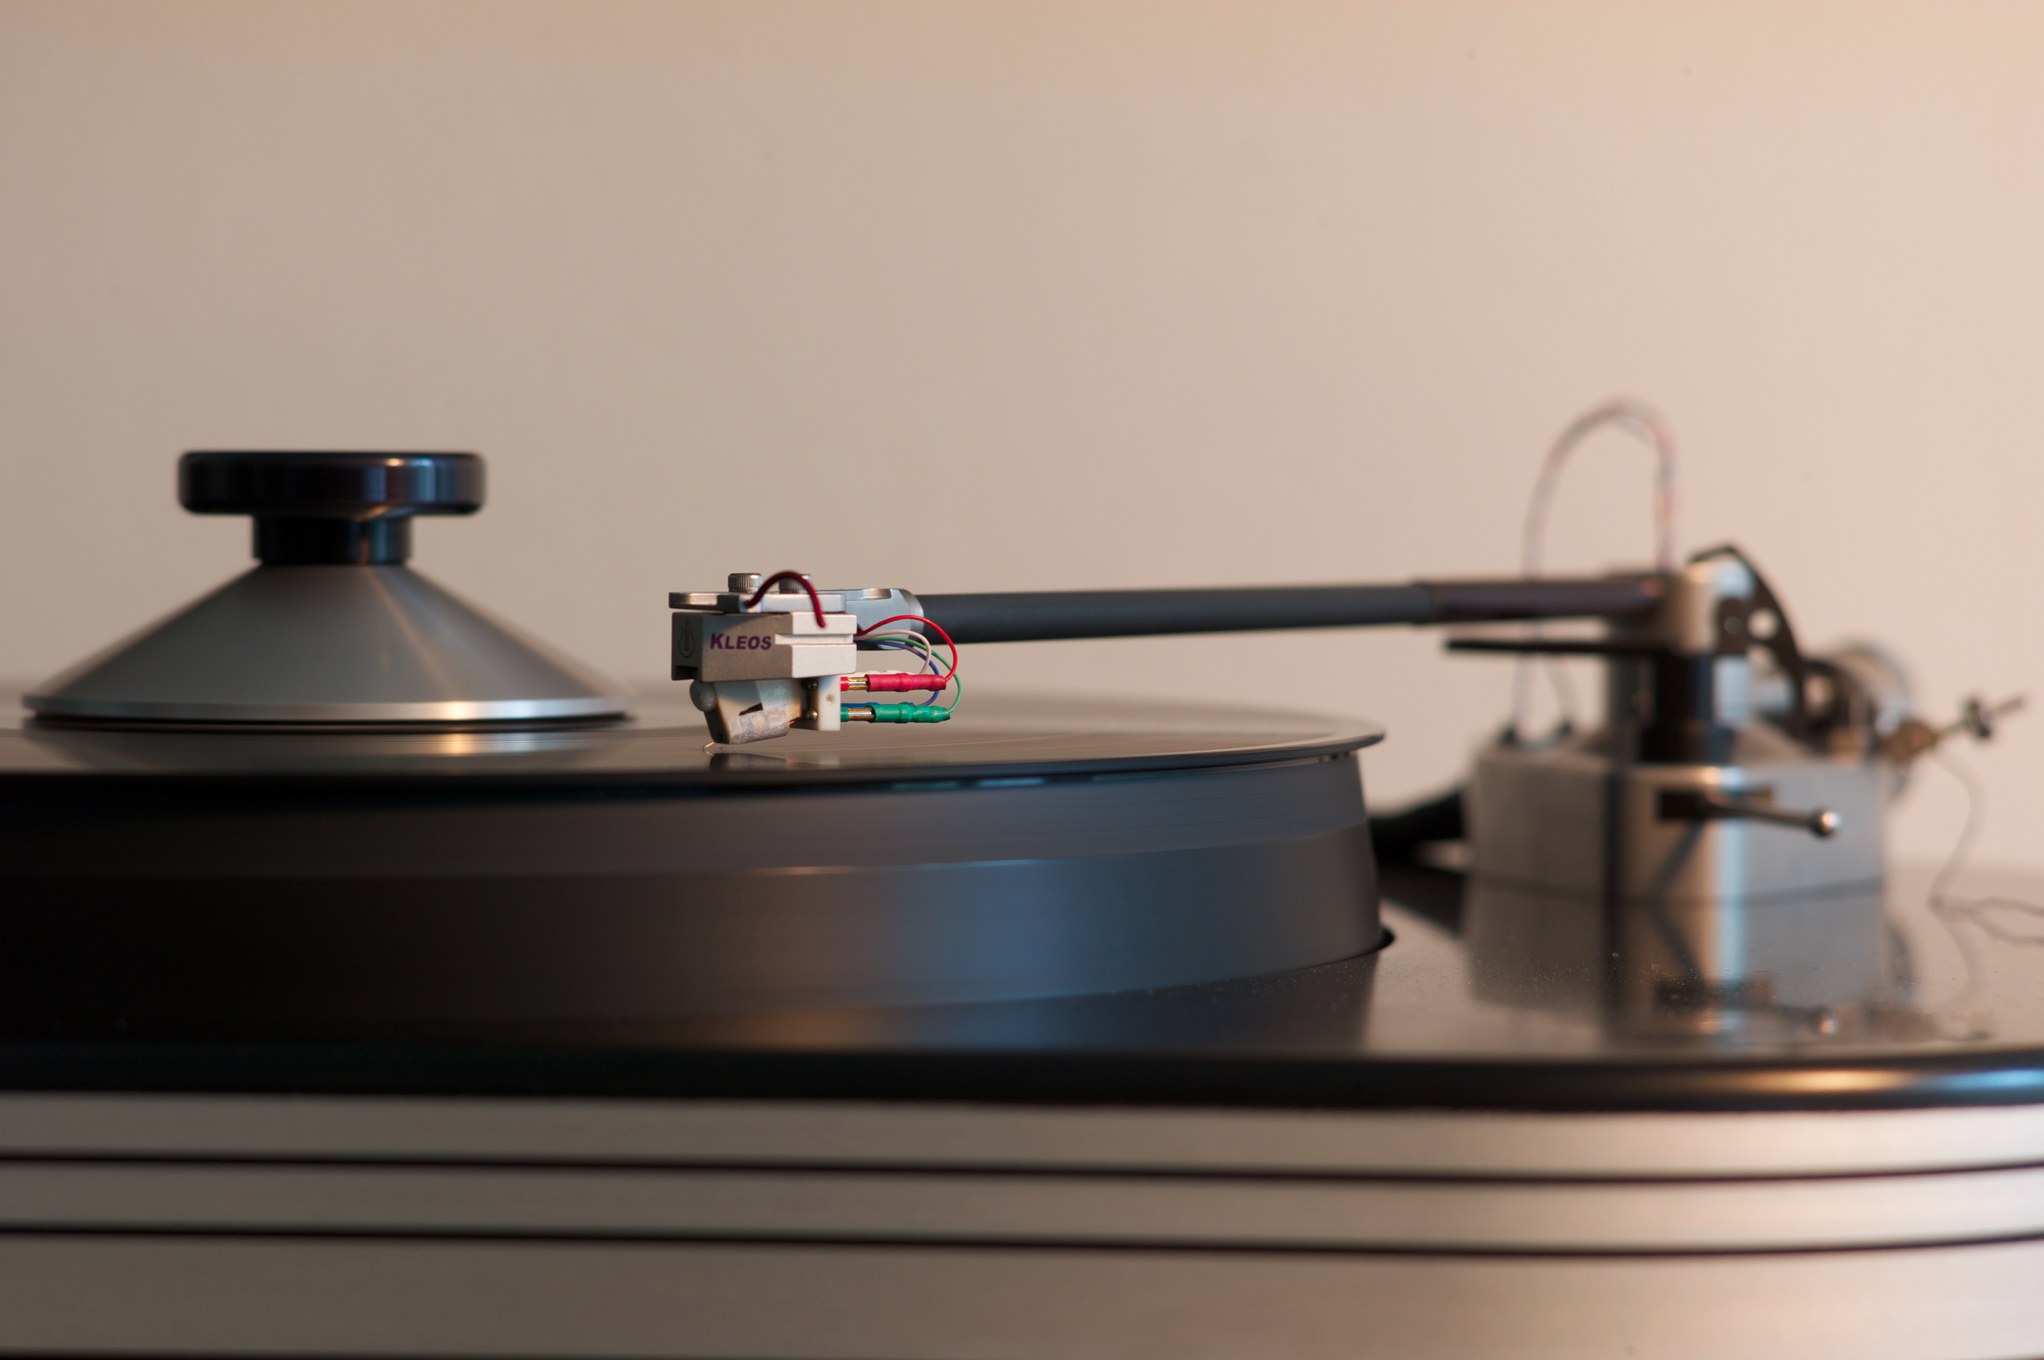
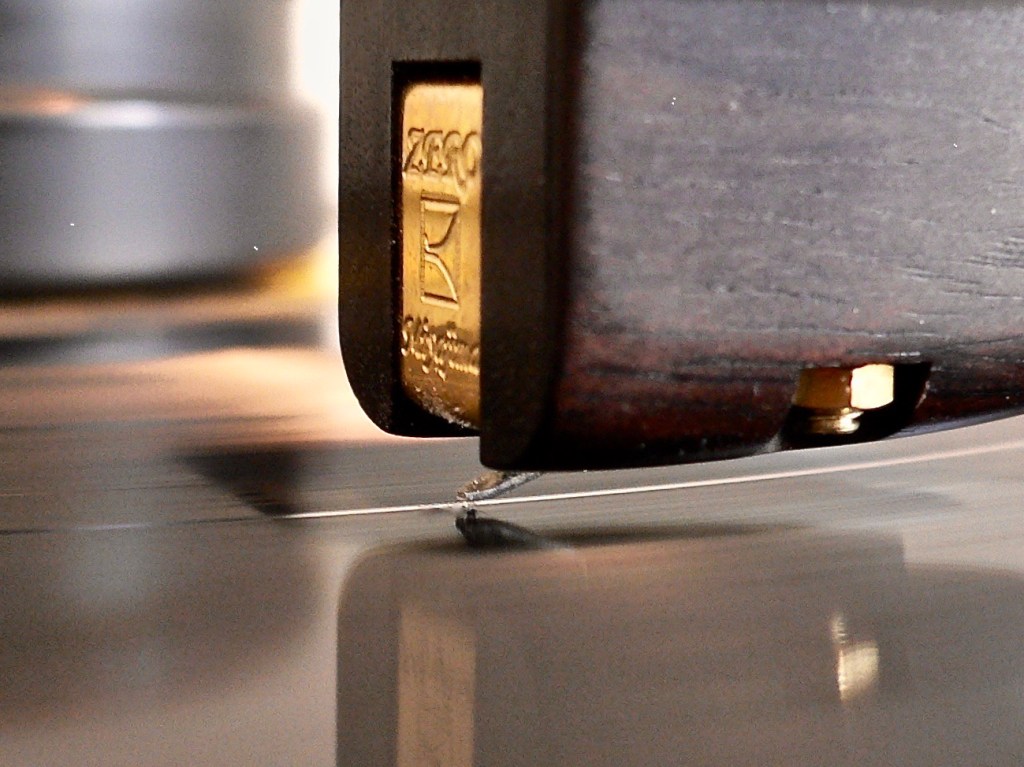
First things first…. we have to mount the cartridge to the headshell of our tonearm and already we face a very important decision regarding the torque we use. This decision depends on the damping behaviour of your tonearm and the energy the cart would transfer. For example a Koetsu wooden cartridge, like the Rosewood or the Urushi range benefits from a really tight fit, it will deliver a much higher resolution in the treble and air frequency spectrum and it will also deliver better macro and micro dynamic. A Lyra cart on the other hand can benefit from a somewhat looser connection to the headshell, which will give the sound some nice midrange bloom, the Koetsu already has in spades. Speaking about torque of the headshell mounting screws, we also must ensure that both screws are tightend as evenly as possible – otherwise we will produce asymmetric tension to the cart. If you handle an unknown cart you normally have no idea which torque figure would be near to the optimum…. It will be a matter of try and error… as the torque you will use has a tremendous influence on the leading edge rendering of the cart as well as the extension of the frequency extremes, you might spend some time with just this single parameter. 

While mounting the cart and applying the four connector wires, we should spend a moment cleaning the contact pins using some isopropanol alcohol to get rid of any grease we might have applied with our fingers to this fragile contact point.

As you opted for a certain geometry which will fit your record collection, take your time and adjust the cart as precisely as possible – do it with both zero points the jig offers…. While performing the geometric adjustment you will put the needle onto the jig a couple of times to align the cantilever with the centric line on your jig. It is a good idea to adjust any antiscating device fitted to your tonearm with zero force, because otherwise the needle could be bent by the antiscating force which will result in a wrong geometry!!! Start by positioning the cartridge housing, if it has a rectangular form factor, parallel to the jigs lines… but the final and most relevant adjustment must be made using the position of the cantilever itself.
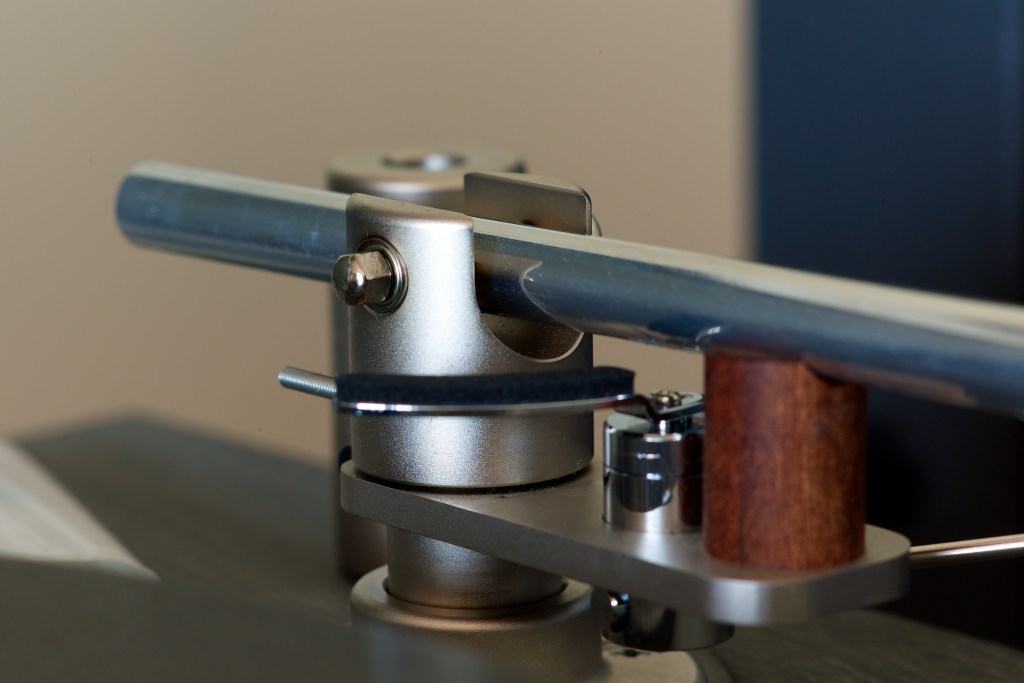
One of the most crucial parameters of cartidge adjustment is the correct azimuth – it is as important as the VTA…. And it is not an easy task to get it right!!! It is a kind of self-deception to think that the needle of even the most expensive carts is mounted absolutely orthogonal to the record surface – it is not! With just a 1° azimuth mistake in your cartridge adjustment you sacrifice the whole crosstalk figure between both channels and therefore the phase response of the cart.  To start the azimuth adjustment we align the cartridge parallel with the record surface viewed from the front of the cart. Now we have to listen to a recording where a vocal is placed dead center with a good portion of high frequency energy. Listen to sibiliants like S, SCH, T….if your speakers and the room acoustic is spot on, you will detect the slightest azimuth anomaly. Even if the sibiliants are behaving in a strange way, the frequency mid section of the human voice might be dead center…it is the high frequency spectrum where a misaligned azimuth is first detectable. But what can we do now….?? Experienced analogue cracks will turn the arm or the headshell ohh so slightly and listen again.. they have such good ears, that they manage to get the azimuth corrected in a way that if you measure the cart afterwards with an oscilloscope in X/Y mode, there will be hardly any correction necessary. But if you are less experienced there is some help coming. Take a mono recording, put it on the platter and switch the preamp to mono mode (hopefully it has such a switch or knob). Then you have to swap the connection cables from just one channel of your cartridge connectors… and put the needle into the groove… What you now here is hopefully near to no sound. Or rather a very, very low volume and just some strange high frequency events in the music, like very dynamic sibilants and snare hits or cymbal attacks. The theory behind this technique is: If we listen to a mono record we can be sure that the signal is really mono… (equal level on both channels – be aware – some carts may have channel imbalance of 1dB or more – I will address that in a follow up). If we switch our preamp to mono both channels will now send the exact same signal to our amplifier and therefore to the speakers. By swapping the connection wires of just one channel on our cart we generate a 180° out of phase signal from one channel…. When both channels are equally merged with the usage of the mono function of our preamp, we should get 100% cancellation of sound. If the azimuth is wrongly adjusted we will get more sound level – because our cancellation will suffer as the left or right channel are no longer 180° out of phase. So the technique must be done without touching the volume potentiometer anymore once we found a good setting… We will not achieve 100% cancellation because our cart does not have 90db or more channel separation as a digital source might have. With a cart we will have 30db – maybe a little bit more…so those short sound fragments of high frequency explosive sounds will remain. The goal is to make these the least audible! If you achieved that – you have set the optimum in azimuth adjustment for your given cart! Do not forget to reconnect the cart afterwards in the correct way – and please do not forget the mono switch;-)))) If you have an unipivot tonearm you might become an expert in the above mentioned technique – because the azimuth is normally changed with a slight turn of the counterweight on unipivot tonearms… but to get the correct VTF you also need to move the same counterweight… To do that without turning the damn weight is a special task…Therefore unipivot tonearms have some advantages in other disciplines – so do not bash them – try to get in a special Zen – Mode, try to smile and enjoy the unforced sound they can provide….

The VTA should be set after the geometrical installation, so that the headshell is parallel to the record surface observed from the side. Please do not use the armtube…some are conical, some have a J or S – shaped form factor so it would be very hard to be sure the cart rides parallel to the record surface. For getting an initial parallel adjustment a plexi glas block with some parallel lines engraved is highly recommended (also to get the azimuth initial adjustment right). After you managed that initial position you have to use your ears!!!! For the following listening session it is good to use records of a thickness which are common in your collection – it makes no sense to use the very best high end pressing made from 200gr virgin vinyl if you have just 3 records of that kind. So use the quality of vinyl which is wide spread in your collection. To justify the VTA you have to take some care in picking the right music. As with the azimuth adjustment session a vocal with good high frequency energy positioned dead center is a good starting point. If you use a Koetsu cart the following procedure might be a little bit tricky, because the special line contact cut of the diamond reacts very, very sensitively to the slightest changes. Listen carefully to the initial setup where the cart is parallel to the record surface…now make some slight changes…start by adjusting the arm tail upwards… listen again…. What should happen now, is that the center focus gets better – the mono mid vocal signal jumps more forward – and in the same moment if you have done it to excessively, the width of the stage shrinks. Simultaneously, the presence of the sound will increase slightly… If some Koetsu owners think you can get more treble out of the legendary cart….that is wrong! What you get is more presence – which will mask the highest treble and air performance – so you did exactly the opposite of what would be a proper adjustment. Also Lyra carts will gain in presence to a degree were the sound becomes abrasive…If you adjust a slight amount of tail down position of your tonearm you might be in for a surprise. A Koetsu will now starts perfoming with its typical delicious treble aesthetic. The recorded space is rendered in a wonderful, opulent way while the center focus is still completely intact. With a Lyra cart such a tail down position might not be what the doctor has ordered – such carts in my experience sounds best dead parallel to the record surface – but….try your own experiments ALWAYS!!!

If the tail down adjustment is done in a more drastic manner (more than 1 Millimeter) then the center focus gets more and more unsharp – we have problems to localise the vocal performance in the center – it is widened in an unnatural way. The bass response will get muddy and unprecise – the bass slows down and the tonal Gestalt is badly damaged! ATTENTION!!!!!: If you use a unipivot tonearm please check after any VTA adjustment the VTF….it will change!!!! Switch on Zen mode again……


Antiskating…..the last miracle

With anything other than a linear tracking arm we will have scating forces varying from the start of the record till the last note cut into the vinyl. So there is no such thing as a correct skating force compensation. Some people will tell you, that a test record is necessary with some tracking torture test cuts. Some people are hardcore specialists in this regard and start to increase skating compensation with more than 70 mü testband….that is TOTALLY WRONG!!!! Imagine…if a rotating tonearm tracks one side of a given record there are two points were there is no tracking error…. The arm now travels in segments in which the scating force rises – and drops again… And it is not only dependant on the tracking angle – there are many more parameters involved such as the stylus cut, the modulation density, the chosen geometry and so on. If you use excessive skating compensation your needle will deflect sideways – so all our azimuth adjustment is now obsolete – the whole phase response of the cart is totally off!!!! And even worse – the suspension of your cart will give up some day….If you do not believe me – go to ebay or some other selling platforms and check out some Lyra offerings, carefully observing the „straight“ cantilever….So forget the 70mü torture track adjustment – that is the wrong way – because the maximum with which a record is cut would be 50 mü – and even a 50mü torture test is not recommended. To get a starting point use the space between the last groove close to the label. Set the needle beneath that groove and adjust the skating compensation in such a way, that the arm follows the last groove or stands still without any movement (till the needle catches the groove). That might be a slight under compensation – but it is a very good starting point. From here on use your ears – if you detect decreased microdynamic performance of your cart – the needle might deflect….observe this with your loupe – and do it on different positions of the record surface. Keep in mind – there is no such thing as a correct compensation – it is always a compromise!!!
The next four essays will deal with some method variation to get the azimuth and the VTA correct, we will discuss the VTF parameter in detail and the electrical side of cartridge performance as well as the damping possibilities some tonearms offer to their users…


Stay tuned


E. Strauss

Tube Rolling – The Big Mystery Part 1

One of the biggest subjects within the permanently growing tube scene is dealing with tube rolling…. And it is one of the most misunderstood elements in the whole High End audio field. Now you will shout at me…”of course I hear the big difference if i change a Telefunken ECC83 Smooth Plate against a Mullard MC1…” – and yes, you are right, there might be a difference, perhaps a big one. Confusion starts when we study thousands upon thousands of webpages or HiFi forums, were people share their tube rolling results with such an absolute claim, that some technically experienced people will raise their eyebrows – and the poor people who asked for some help will have to spend a lot of money buying rare NOS stuff on the basis of these indications to learn, that most of these spot on advices are not worth a single penny. 

The task of tubes:

One of the most important things with internet community advices regarding the usage of a certain electron tube, is to make clear that the asking person and the helpful community speak about the same thing. If I would like to get some advice in choosing a specific 12AU7 to be used in a splitter position on my amplifier it is completely wrong to ask stupid questions like ” what is the best 12AU7″. As all “what’s best” questions are obsolete in our beloved hobby – the answering community might have recently tested some 12AU7 in an USB DAC, where the task of the 12AU7 is – if we are lucky – to be a gain stage and not only a device to add some harmonic distortion to the otherwise clinical sounding DAC. Such an application area is far away from what a 12AU7 must achieve in a splitter stage on an power amplifier.

To make things even more complicated – there is no such thing as THE splitter stage, as a lot of amplifiers combine in a single double triode per channel a splitter AND a driver stage. If two people share their experience about a good splitter tube the one with separated splitter and driver tubes might come to a completely different solution than the other person who has a combined splitter and driver stage in one single tube. To cut a long story short…. the minimal basis on which such discussions should take place is some knowledge about the circuit in which a tube does its job!!!!

A little test:

Lets try to get things simplified….In the following example we use a pre amplifier which has just one double triode of the ECC83/12AX7 type in its gain section – and the only thing we will change is exactly this single tube – we change nothing else. To start with our little test session we have to choose some suitable test signals…It is very interesting to start with just white noise generated by your laptop via an online noise generator. Therefore we connect a laptop to the preamp via some cable adapters. Please adjust a fixed volume and do not touch it anymore during the following test:

Now we will start the white noise generator with our first test subject – lets say we use a Telefunken ECC83 smooth plate. After a proper warmup period (10 minutes) we will then listen to the most “exciting” signal on this planet – pure white noise…it doesn’t get anymore stupid than listening to white noise – but for our short experiment we have to survive this! 

While we are listening to boring white noise we should concentrate on the sound of the test signal as much as we can… After we have gotten an idea of the sound and have inculcated it as hard as we can, we will switch the amp off and should wait 2 – 5 minutes to pull the Telefunken (use gloves – the tube might still be hot) and change the German tube to our second test example – the RCA 12AX7 Black Plate…. switch the amplifier on and sit down on the same spot you heard the Telefunken just 5 minutes ago….

….As white noise implies all frequencies with the same energy, we have a tremendous broad band signal without any tone, any melody, anything which can distract our attention from the frequency response of those two tubes. But what is this? …The difference is very, very subtle, so that we have to do this little test more than one time. If you have a chance to do this with two people – try to complete some blind tests. Can you really hear a difference???

Maybe there is a slight difference in broad band static frequency response – the RCA might be a little bit darker with a tad more upper bass extension and the Telefunken might be a little bit slimmer in the upper bass register and possibly shows more energy at the absolute top of the spectrum – but the difference will be very, very minor! – I bet that in a blind test you will have a 50% chance to name the right tube – not more!

Now we change the test setting…

We will listen to a digital medium like a CD and we choose some type of music with a very boring drum pattern which would be repeated in an endless loop – electro tracks are very, very good for such a test. The track should have some good dynamics – not one of the mid 90ties productions that are crushed by the mastering limiter…. Now we start the same procedure as with the white noise session – and remember – do not touch the volume potetiometer once the test has begun. 

Now the difference is much clearer… (depending on how well you choose your test song). With the Telefunken we have a clean and clear picture of the music. We have a near to neutral frequency response and a tremendous clarity in the whole midband as well as a good macro and an outstanding micro dynamic. Now we switch to the RCA Black Plate…. The first – maybe most obvious – difference is the deep bass the RCA is producing. While the Telefunken was fast and very differentiated in the deepest register the RCA has more punch and less clarity and speed but it seems that there is a higher dynamic in the deepest bass. The mids are thicker and a little bit less clear – the dimension of the stage is huge – very wide – but not deep. The Telefunken has a slightly tighter stage width but is able to tell us something about the distance of each source, which the RCA is not able to do in an equal fashion. The presence of the RCA is higher as with the Telefunken – it sounds more dynamic around 3 – 5Khz. A snare will hit us directly and the snare has slightly less mid body and sounds sharper. The attack shifts upward with the RCA. On the other hand the RCA doesn’t have the resolution in the upper spectrum around 12Khz and above, which the Telefunken can provide. The RCA sounds more muted as the Telefunken and that makes this tube sound more warm, more like people think a tube should sound. The localization accuracy of the Telefunken compared to the RCA is a different class….were the RCA tells you something about the position of an instrument in a more relaxed fashion, the Telefunken produces a pinpoint accuracy. 

Maybe your observations may vary slightly – but the basic direction will surely be comparable. The big question is now – why do we hear such a slight difference if we listen to a static white noise test signal and a more or less huge difference if we listen to real music? The answer is, that the tubes are all relatively equal in frequency response if the signal is static. All the differences we determine are more or less a result of the dynamic response each tube gives us. 

Time for a more drastic test procedure:

In this third test we need to have some special gear, which not everyone has at home. We need a digital workstation to record a waveform of the dynamic response our two test tubes produce. For this experiment we connect the input of our workstations digital interface to the output of our tube preamp and vice versa (be careful: don’t use the same input and track or you will create a feedback – so some routing experience would come in handy). Now we can record the signal the preamplifier normally would send to our power amplifier. And at the same time we can do much more with such a hard disc recording system – we can design our own test signals. Therefore we will prepare the workstation to send some burst signals in different frequencies to the amplifier – which we later on will record through the preamp with the two different tubes. We will have a burst around 50hz, 200hz, 500hz, 1Khz, 3Khz, 5Khz, 8Khz, 10Khz. These bursts contain sharply cut (64db/octave) white noise samples, which are just 100 milliseconds long.

Now things become very interesting….

If we analyse the recorded waveforms, we can detect a huge difference between the Telefunken ECC83 and the RCA 12AX7 Black Plate. The RCA has a lot more rounded leading edge with deep frequencies and also produces a kind of compression which makes the short burst longer at the time domain, because the decay curve is lifted up, while the peaks are slightly rounded. The Telefunken in comparison handles the leading edge almost without any rounding and applies almost no compression to the signal – Input and output signals look almost identical. If we analyse the other frequencies the outcome is even more astonishing: The RCA reacts on very high frequencies like an electro optical compressor… we can see a slow attack time and after the leading edge has passed, the decay is compressed with a small ratio and a long decay time, which is what we also hear with music – a cymbal has a soft attack and a long decay and is defensive in its character. The Telefunken does nearly the opposite – the attack of a high frequency burst has the same shape as the incoming original signal – there is no compression at all – the frequency burst transmitted through the amplifier is as long as the signal sent to the amplifier. Both tubes act with a tremendous difference! 

And now:

What we have found out by this point is the fact that two ECC83 tubes in the same circuit with exactly the same requirements act differently. But which one is better??? If your room acoustic, the speaker placement and the circuit of your amp, the chosen cartridge and the speakers themselves have a certain acoustic fingerprint one would choose the RCA, while in a different situation the Telefunken might be unbeatable. Do you see how helpful tube rolling advices are…??? 

It all depends on the smallest parameter – one high end enthusiast will tell you a Mullard MC1 will be acoustic nirvana, while another one will tell you the same about a Siemens Halske ECC83 MC2 which sounds totally different. Some people will also tell you that in a good circuit the tube and its sound character does not make any difference which is completely wrong! Each tube has a certain fingerprint and it is not an easy task to find a setting in which it doesn’t act as an equaliser, but instead shows you the beauty of the recreated recording in a neutral way.

A real life example:

If you, like me, own a LS3/5a setup – and in another room with very comparable acoustics a pair of Quad ESL 57, both paired with the same cartridge, mounted in the same tonearm, on the same deck, you will detect that the LS3/5a tweeter is a different pot of tea than the high frequency performance of the ESL57. The KEF tweeter of the LS3/5a is much more unlimited in bandwidth, while the ESL 57 shows a relatively sharp high cut around 18 Khz. A Lyra cart amplified with a high bandwidth phono stage has a tremendous high frequency resolution. With the LS3/5a it could be too much of a good thing – under certain circumstances those tweeters can produce a slight edge on vocals as well as cymbals or high strings and also organ music with high frequency registers. The Quad is a different breed – it needs every single drop of resolution we can squeeze out of our system. The high frequency response of the LS3/5a also acts a little defensive within the presence register around 3 Khz while the Quads behave more linearly in that particular region. So with the LS3/5a we must avoid tubes which create a high frequency sensation, moving away from the path of neutrality, while the Quads need very open sounding tubes. For example the above mentioned Siemens Halske ECC83 MC2 paired with a LS3/5a monitor would sound slightly synthetic in the highest treble section (paired with a Lyra cartridge) while the Quads will show you very, very clearly the HiFi like behaviour of this particular Siemens tube, which has a recessed midrange and some spectacular bass response as well as champagne like treble and air expansion. If I would mount a different cartridge to both systems the outcome will be completely different.

How big are the differences???

If you expect a night and day difference between good quality NOS tubes I must disappoint you – the differences are subtle but clearly audible and in a highly tuned setup they can make the difference between good and amazing! So tube rolling makes sense and can be much fun but also implies the danger of large frustration. A lot of people think that a tubed system can be used to diminish the effect of a bad room acoustic or that ultra expensive super tubes can transform a poorly designed amplifier into something great – both is not the case. The right tube in the right spot chosen with great care is the cherry on the cake. The more resolution your system has, the more important the choice of the right tube in the right spot will be.

Audio is a chain:

Some people do extensive tube rolling with their power amps, they spend a fortune to get rare NOS power tubes and maybe spend the same money on tubes wich have a mega reputation, while the preamp gets less attention. This would be a big, big mistake. As an audio system is a signal flow chain it will all be influenced by the weakest component. The preamplifier and its tubes has a much bigger impact on the whole sound Gestalt than the power tubes – and even more dramatic is the choice of tubes in your tubed phono stage. As a rule of thumb you can say that those tubes with the greatest amount of gain will have the biggest influence on the global sound of your system. But be careful – if you rolled the finest phono as well as superb line stage tubes and you gave everything to get the input, splitter and driver section of your power amp right – BUT you chose some inferior power tubes – a lot of your work will haven been for nothing.

A good advice might be to get all the stages till the power amp as transparent and neutral as possible. With the power amplifier at the end of the signal chain we have the chance to voice the system to our liking (within certain limits). Please take note – no single super NOS tube can repair any mismatches in system assembly – nor can it repair impedance mismatches between the different components or a weak acoustic in your listening room. But within certain limits we can adjust to our taste and maybe ameliorate some special system colourations by rolling specifically chosen tubes. Tube rolling is a little bit comparable with extraordinary cooking…Take your time and be patient – and before you spend crazy money on holy grail tubes – get every other parameter in your system up to the task!!!!

Stay tuned for part two….


E. Strauss

Air Tight ATE 2 – a full tubed full function preamplifier

The company:

With the Japanese company Air Tight there is a lot to discover which is completely absent in todays High End scene. Product running times of more than thirty years without any MK II or upgraded version of a given amplifier is something we wont find at any other company today. If a piece of gear is developed, than it IS developed, there is no reason for any change, which says something about the quality of the development. Miura San is one of the last living legends in the audio scene, meanwhile in his mid eighties, he has a lifetime of experience in building tubed audio equipment, a sort of deep understanding seldom found in todays fast changing market were every year new completely unknown people want to tell us, they found a new technology in amplifying an audio signal. With some new technologies, like digital amplifiers, that might be true, but with tube technology???

Miura has a sort of calm style in managing his company and developing audio gear. Things need time, countless listening tests, which was very clearly seen with his Opus 1 cartridge, which Air Tight brought out two  years ago as a cooperation project between Matsudaira San (My Sonic Lab) and Miura San of Air Tight (A&M ltd.) to celebrate the 30. birthday of the company. Miura needed more than 3 years from the first prototype, shown to the press and some “insiders” for listening tests, till the final product entered the market. And between the first prototype and the final candidate, there was much more different, than just the styling of its beautiful appearance. Instead of that Miura changed a lot of details which had a tremendous impact on the sound of the final product. It is astonishing how a man in his mid eighties could achieve such a good hearing as also spending so much attention to the finest details. The fruit of his restless work was once again, as we witnessed it more than 10 years ago with the legendary PC1 Supreme cartridge, a place at the very top of todays cartridge designs. The portfolio of the small company near Osaka, which counts around 6 employees, is dedicated to the analogue music lover. There are no CD players or DA converters in existence, instead of those kind of products, Miura offers a wide range of tube pre, phono and power amplifiers, which use nearly every single famous power tube concept in existence, as the 300B, 211, EL 34, EL84, 6L6 GC and the KT88. The output power varies between 2X 8 Watts of the ATM300 to 2X 110 Watts of the ATM3 EL 34 monoblocks and is finely graduated. Not only this wide variation of power tube concepts reminds me of one of the other legends in the Japanese art of building tube equipment – …Shindo.

An indication of both companies is the fact, that the price of an amplifier has no direct influence on his sound. The smallest amp Air Tight has in their portfolio, the ATM1s is one of the finest EL 34 amplifiers I know.

P1060676

The difference in money you have to spent for the power amplifiers has more to do with the size of transformers (and their price tag) and power supplies, because a KT88 in ultra linear operation with its 2X 75 Watts needs more expensive iron, than an EL 34 amplifier, the exception of this rule concerns all single ended amplifiers. What I want to say is – in the Air Tight amplifier lineup there is no such thing as entry level and reference level in their ability to give you a maximum in soundquality! That said, things change quite a bit with the portfolio of preamplifiers – here we face a difference in fittings, be it the existence or absence of a phono sections, or the kind of outlay in which the gear is made. And even if there is a sort of range describing the quality of the different preamplifiers, there might be also some exceptions from that rule. If the little full function preamp ATC1 is mated with the previously mentioned ATM1s, (a pairing which was made for each other and was also developed together), you are in for a treat!!

The lineup includes pure line stages and full function preamplifiers with on board phono sections, as also stand alone phono preamps. The more basic (which does not mean simple or bad sounding) gear share a transistor, diode rectified power supply, as we climb up the range, we get tube rectifiers and full tube stabilisation with some of the most elaborated hybrid power supplies you will find on the market,

The Air Tight ATE2:

P1060622

Miura had the Chuzpe as an analogue lover to bring a full function preamplifier to the market, which has a full blown phono section with all bells and whistles – but he equipped the ATE2 just with one single line input. So the ATE2 is not for those audiophiles, who have a tremendous number of gear….just ONE nice FM tuner or CD player, maybe a DAC with switchable inputs (which gains the flexibility if you have more than one digital source) and you are done with the number of line inputs. On the other hand, you will find two MM inputs, switchable from the front plate, and a pair of phono direct outputs, bypassing the whole line stage with all switches, volume control and of course the tubed line gain stage.

P1060664

This additional pair of output jacks are very special and offer us different operation modes. You can plug the phono direct outputs into your favourite line stage, as you can feed the Air Tight amplifiers directly, because they all (not the ATM300) have two  switchable pairs of inputs and sensitivity potentiometers, to adjust the volume or gain. The latter will be the most pure signal flow you can achieve. With its 200 Ohm output impedance the ATE2 has no problems to drive nearly every power amplifier on the market directly. If you have a second amplifier setup in your room, those extra pair of direct phono outputs can also be used to feed a different system, while the whole full function preamplifier resides in his setup, it can distribute the phono signal fully processed (RIAA eq and gain) to another device.

The power supply:

P1060668

Miura San opted for tube rectifiers and tube stabilisatation in the power supply of the ATE2. Together with the in house produced power tranny with its 8 different outlets, we will find a single 6X4 full wave rectifier tube. Stabilistation is done with a 12BH7 double triode and a EF 86 penthode. The regulation is accomplished fully discrete using the finest components available. Miura replaces electrolytic capacities as fast as possible in favour to high voltage foil caps in the signal chain and supply voltages.  Therefor he uses the excellent  Audience (Auri Caps). Electrolytics will be found just  in the first stage of the power supply and in some regulation circuits, together with ASC paper in oil caps a reminiscence to the golden time of tube technology.

P1060658

After careful listening sessions, I opted for a GEC CV 4005 black plates in the rectifier stage, which is a British military version of the 6X4 or EZ90 (the European designation for the same tube). The two stabilisation tubes EF 86 and 12BH7 were selected with RCA 12BH7 black Plates foil d getter from the end of the fifties (last century;-)) and the legendary Telefunken EF 806S, which got this status from its use in the well known Neumann U67 microphone.

P1060466

The phonosection:

A novelty in the Air Tight portfolio is the fact, that Miura uses in each of his phono section exactly the same design – what differs is just the expenditure in its layout. The basic design features a 2 stage gain section made with 3X 12AX7 (or ECC83) double triodes. The first gain stage is made with one single 12AX7 which does just gain at this point – subsequently we will find the bass emphasis part of the RIAA curve in the signal flow,

P1060665

which is located between the first and the second gain stage to avoid noise. The second gain stage uses just one respective section of the two remaining 12AX7 double triodes, after which the signal passes the treble processing of the RIAA curve.The complete equaliser section is made by using a CR circuit, one of the simplest ways to achieve a highly accurate equalisation with a minimum of fuss and parts.

P1060663

To get a preferably low output impedance Miura designed a SRPP circuit in the decoupling stage of the ATE2 using the two remaining section of the 12AX7 (ECC83). So all in all we have 3 12AX7 (ECC83) in the phono section of all Air Tight preamplifiers with exactly the previously explained implementation. What differs is the kind of execution, the quality of the parts and the power supply. The whole amplifier is point to point wired, which also applies also to the phono section. The whole circuit is placed on a smooth copper plate, which is treated with Zappon lacquer to avoid oxidation. This copper plate has two functions, on the one hand it shields the small signals from electromagnetic pollution, on the other hand it acts as a mechanical isolation device.

The line stage:

P1060682

In the line stage of the ATE2 Miura choose ECC88 frame grid tubes . Those are naturally superior to any 12AX7 (ECC83) or 12AU7 (ECC82). With the frame grid technology the Philips group found at the pinnacle of the tube age one of the most dramatic progression in the sound quality of electron tubes. If you have the chance to peek into such a construction, you will understand that this technology signified a whole new chapter in tube design – those tubes are made like a piece of mechanical and electro mechanical art! The ATE2 uses a two stage design in their line section implemented with two ECC88 and decouples the signal with a SRPP design we already discussed with the phono section to achieve also 200 Ohm output impedance.

P1060683

The volume tracking is accomplished with one of the best possibilities next to a ladder switch, by using the very famous ALPS Japan RK 501 pot….A haptic enjoyment! This thing is extremely transparent and does not ad any coloration to the sound, as it gives you a very precise tool to adjust volume, even in very, very small increments. The stunningly even channel balance of this pot is amazing – even if it does not work in its optimal range – amazing!

Controls:

P1060672

Next to the ALPS RK 501 volume potentiometer, we will find a stereo/mono switch on the front plate of the ATE2, as also balance control and two switches for the different sources. The latter is made in a special way – you have a switch which selects line or phono, and an additional one for selecting one of the two phono MM inputs. All switches are easy maintainable if one day they need some cleaning. Both switches  do react without any noise! Last but not least we will find the power button on the right side of the front plate, which is typical for any Air Tight gear. Miura designs every piece of gear with a certain legality, the power supply sections are always at the right side of the gear as it is the power inlet.

P1060637

It is very easy to built up an Air Tight system without getting a big mess behind the gear with signal and power cables twisted together – very, well done Mr Miura! The principle of design means also, that we have to place the gear in a certain way – our goal is to get the largest distance between the power supply of our amplifier and the input section of the phono stage – and as the gear is made as it is – it is an easy task.

Tube rolling:

P1060456

As I use my beloved Quad ESL 57 with the ATE2 it is not recommended to mess up the incredible resolution and pureness of this preamp. So I opted against some very exciting Mullard long plates (MC1 long plates square getter) – because those type of tubes work perfectly with a speaker like the LS3/5a – but not with the restricted amount of highest treble energy the Quad has to offer. The KEF T50 tweeter in the LS3/5a together with the deviding network means a slight treble rise with a tremendous resolution – the T50 is able to react on frequencies over 40Khz with ease. The Quad is a different breed – the treble starts to roll off at 15Khz – and is nearly absent at 18Khz – a Mullard – as beautiful it might sound, is the last thing we need with this speaker system. One might think an Amperex would be a good choice – and yes, I tried this…. I use Amperex long plates 12Au7 and 12AX7 Foil D Getter in another preamplifier in my Quad room – but in this case, i could detect a pronounced emphasis in the prenence, which is typical for the Amperex long plates and one of the reasons for their amazing 3D abilities…. But with this specific preamplifier it was too much of a good thing…

P1060617

With the decision of proper NOS phono tubes, we also decide what kind of performance we will get regarding the noise coming from the record – all this little nasties like clicks and pops could be amplified in a way, that we will get crazy or we have a lucky smile on our face. There are NOS tubes in existence, which set these noisy signals far away from the music – they perform in such a quick way, that a click is just a short signal, with a Mullard (MC1) in a phono stage, such a click will be a real event, something I cannot live with;-))))

That does not mean, this legendary Mullard is a bad tube – far from it – but in a phono stage ist is everything else than a perfect solution!

P1060451

As you might guess – I opted for a triplet of equally numbered Telefunken ECC83 smooth plates. A tube which is sooo quiet, one of the most silent ECC83 I know. And the Telefunken can transfer those clicks and pops in something you are able to ignore – a miracle! The ECC83 Telefunken has such a balanced sound, which lets the ESL 57 shine. The bass is tight and well rendered, the mids are outstanding – maybe the reference point in this tube class (read my essay about the Telefunken ECC83 on this blog) – and last but not least we get a high unforced treble resolution, something the Quad needs so urgently! At the whole frequency spectrum the Telefunken is almost neutral – especially in the midband, which is is a MUST, if you listen to a pair of Quad ESL 57 – this little divas are able to show you the slightest amount of coloration.

P1060448

With the line tubes it was not such a clear decision, and even today, I can live with more than the single solution I finally choosed. I had some of the finest ECC88 to play with, and every single one of them has such a tremendous sound quality with some special colours, the others miss. My stash included Siemens Halske CCA, Telefunken E88CC, Amperex Bugle Boy 6922 Gold Pins and Valvo Red Label E88CC. The Siemens had the finest resolution and the tightest bass – the air this tube can deliver is outstanding, the whole amplifier starts to breathe – amazing! – But the Siemens has a slight defensive midband section, a little bit of the classic HiFi coloration. That is easy, if you listen to Jazz or Vocals as also Pop music – but if you choose one day a very good classic recording – you will detect what I mean. It is still acceptable if you listen to small orchestra music – but if you choose romantic music, like Mahler or Bruckner – it does not work…..massed strings get a synthetic touch, the overtone spectrum sounds not natural anymore….

P1060661

The Amperex has an amazing 3D rendering – it is one of the rare tubes which can tell you something about the third dimension in a given recording – you will get a real nice picture! BUT – the Amperex is also coloured –  here it is the presence area of the spectrum. This makes vocals super sexy – female singers are a sort of an erotic experience – but than you listen to some distorted guitars – and it is all over….;-)))) – The presence emphasis transfers a Metallica record to more or less something we would call noise…..yes I hear you – you think IT IS NOISE – but It is not….The guitar sound produced on this specific album is like jumping in a warm swimming pool…. It is arranged in a style comparable with a church organ – listen carefully, and you might detect this album is far from being just noise – even it is Heavy Metal!!!!!!

P1060670

The Valvo Red was amazing – as was the Telefunken E88CC – both are maybe my favourite E88CC in THIS PARTICULAR preamplifier..both share a neutral midband, both have a natural unforced resolution, the Valvo Red being a little bit recessed in rendering the highest frequencies – but not in a way, that I missed something. The Telefunken was more open, and acted quicker at the leading edge. In opposite the Valvo had a slightly more impressive bass…..if I am bored – I can change those two E88CC tubes back and forth – one month is Valvo month – followed by a Telefunken month….I started with the Telefunken E88CC!

The enclosure:

P1060654

Miura San built his gear like it was made in the golden age of tube amplifiers. There is no cheap aluminium box screwed together, instead he uses a steel enclosure of 1.3 – 1,6mm thickness welded together! After that procedere the chassis gets some solid layers of automobile paint in a baked finish. The reason for such a tremendous outlay is on one hand the perfect shielding such a faraday cage is able to accomplish, on the other hand we will detect that steel is a fantastic resonance absorber. The aluminium frontplate is just screwed on top of the steel enclosure to get a nice an stylish appearance.

P1060623

The bottom of the ATE2 is made of copper – that means that gear which stands underneath the ATE2 cannot radiate electromagnetic pollution into the fragile circuits. The whole preamp enclosure is divided into 3 main sections. One section is reserved for the power supply and separates the top deck of the ATE2 in two section using a massive copper plate.  If we turn the ATE2 over, we will find the bottom main deck, in which the complete line section is located.

The Sound:

P1060576

I own from Air Tight also the ATE 2005 stand alone phono stage, which uses the same circuit and layout as the ATE2 in its phono section. They both just differ in their power supply (and a very special MC head amp the ATE2005 features). Were the ATE 2005 uses a transistor power supply and diode rectification, as also full discrete transistor regulation, the ATE2 uses a full tubed power department.

L9990240

Both differ also in their gain layout, a consequence of the built in MC head amp in the ATE 2005…(another story…)

The ATE2 features 36db of MM phono gain, the ATE 2005 just 30db. For any comparison I had to adjust the volume accordingly – which I did. The impact of tubes in a well built power supply is clearly detectable – the ATE 2005 has a drier bass response, very tight and limitless, while the ATE2 brings a certain agility on the table with an aesthetic which is completely different from the ATE 2005. On Dancefloor, Electronic and some Pop music pieces I like this tight, deep and impactful behaviour  of the ATE 2005 very much. If we change the music style to Classic or Jazz, the ATE2 sounds more real, the bass ist more articulate, even if it is not as tight. The music beginnst to breathe, there is a sort of beauty in the bass rendering, which the transistor power supply equipped ATE 2005 cannot counter. On the other hand the ATE 2005 has a sort of openess, which the ATE2 can not muster. The Air and resolution is astonishing – while the ATE2 reacts in a smoother warmer style! Both are some of the finest tubed phono stages in existence today – and both are everything else than equal!

P1060535

The ATE2 os able to render a jet black background, the micro dynamic abilities are stunning, even the slightest shades of dynamic contrast is presented in all its glory, which is also a form of resolution, nobody speaks about today….but it is a very important type of resolution. Treble and Air resolution, which we get in spades since a couple of yers even if the whole picture drifts into analytic insignificance is one part of the story –  but what makes you sit and listen while forgetting to breathe are the finest differences in dynamic shades…I could (and do) waive the last ounce of treble and air resolution with my choice of speaker (the ESL57) but I cannot live without the finest dynamic shades – which brings – in my opinion – music to life. The ATE2 shows this ability with tremendous realism, and the ESL can transduce the whole picture in all its complexity in a very accurate way.

This preamplifier reacts very, very fast to the leading edge of a sound or instrument, and all the Quad lovers will agree, this is one of the skills were our beloved “vintage” speaker shows to most of all modern designs what attack speed is all about. You can witness the birth of a tone – what could be more beautiful….???

It is stunning what Peter Walker designed sixty years ago, which we can enjoy in all its beauty and perfection with todays elaborated moving coil transducers and high resolution (in a good way) electronics.  It reminds me of an old Leica screw mount camera with its famous Elmar 1:3.5 mated with a modern black and white film….The picture (sound picture) is in both examples a long forgotten type of aesthetics, which touches our heart. It is not a photoshopped high resolution digital picture with all its arbitrariness!!

P1060729

The ATE2 could be your last preamplifier, if you can live with just one line input, it is THAT GOOD. There might be more resolution, more bass, more treble or more macro dynamic today in the most modern and elaborated designs – but the wholeness, the natural kind of rendering this thing is capable off, differentiate real music played by real human beings from a sort of an effect dilution.

Its comparable to movie films – one needs hundreds of Avid and computer –  rendering effects to get the plot through – the other movie has just a perfect and tasteful camera mated with a fantastic script. If you have really something to say  – you just need a quiet audience…..

Think about that….

Stay tuned


E. Strauss


The Marantz CD94 – Part1 (the drive mechanism)

A musical digital player??

If we look at the CD player situation today, there is not much to write home about…. Today we have to accept, that nearly no company is manufacturing dedicated CD transports anymore. The last decade was full of CD machines which used transports originally deigned for computers or car stereo systems – the decade of really high quality dedicated CD drive mechanisms ended around the the year 2000. Since than we got a lot less for a lot more money. Any DA converter needs a proper source, and if  we skip for a moment the whole streaming possibilities, the source for a DA converter is a sort of physical media – normally a CD or a SACD. Both optical media needs a damn good drive mechanism for reading the implemented digital data – hopefully with near to no loss, low jitter, fast and secure action, isolated from vibration implemented by the player itself or from the outer world.

Maybe you asked yourself while reading CD player offerings at the used market – why in nearly every advert you will see, there is some information written about new laser mechanisms or a brad new complete CD drive which was implied in a 4 year old machine??

Now lets jump directly to the years from 1985 – 93….the time, were you sold your record player and dived into the modern digital world. You bought your first CD player – and you had during its time in your HiFi system never any problems with the CD drive mechanism – maybe the unit needed at some stage a new driving belt for the CD drawer – but changing laser mechanisms or whole drives was not a task you had to deal with – right????

You changed in that period of time maybe the player – maybe more than once, because the big HiFi magazines told you that every new generation of CD players surpasses the actual generation – so an upgrade was mandatory….  The same story is also told to us till the CD as a mass media lost its importance agains streaming solutions. But was it really true, what was proclaimed???

Philips changed the design of their CD 0 drive to the CD 1 and later on they brought out the CD9 and all these steps were not made to design something better – it was made, because they wanted to make the things cheaper. The same can be said also about the ladder multibit DAC – in Part II of this article I will come back to that story.

P1050677

Believe it or not – one of the best transports ever made was the Philips CDM 1 pro drive used in the end of the 80ties, last century – and even the first CD transport ever manufactured, the CDM 0 was a legend, regarding data integrity and fast operation. Those CDM1 pro drive mechanisms were used in the CD check machines the mastering studios used to check the digital quality of the media (digital errors). They were so good, that it was the reference, were everything else was measured against it. And of course they were expensive – made from metal cast, supplied with a sub chassis mechanism, a Rodenstock glass lens system (no plastic optics) and the speed of tracking though the index of any given CD was miles ahead of nearly anything which came later to this party. In one word – it was maybe the epitome of a CD drive mechanism – but it was too expensive to achieve a complete player, which could compete with the price of a cheap coffe – machine at the point of sale – electronic super markets…. From that time on, things got not better regarding the CD drive quality – it got worse – and today we have to accept, that in most modern CD players we will find just crap, which has to do the sensitive job of reading data from a digital media!

What really changed during all this years is maybe the quality of the DA converters – in the 80ties more that 16 bit resolution was seldom seen – and at the end of the ladder DAC period, 20bit performance was the best we could achieve with this technology. However – if we do not get the data from the media with the highest possible integrity and precision – if our source is not of the highest quality – all which comes in the signal chain after that stage is more or less questionable.

Restauration of a masterpiece:

P1050665

The CDM 1 Pro drive used in one of the most well regarded CD players during those years, the Marantz CD94 (and also the MK II version of this player) will have some problems because of its long period of usage, we have to care about. Most of the units which are offered as defective, do not have any trouble with the laser diode – they all share one design problem, which we have to deal with. This design “problem” addresses the bearing of the rotary CD platter. This bearing is constructed as a plain bearing – a spindle is placed on a special plastic disc – the plastic is of such a kind, that the spindle do not need any excessive lubrication. Over the years this spindle works now its way into the plastic platter – there will be at any CDM1 pro a more or less deep groove in this plastic platter of the main drive bearing.

If the groove is cut very deeply, the distance between the CD surface and the movable laser diode is at some point too large – so the laser unit can not precisely focus anymore. The player will give us some error message – and most of the users think – the laser diode is worn out – but in most of the cases it is just a mechanical bearing problem . To solve that, we have to adjust the platter hight to a point were we compensate for the groove. This is manageable with a little bit of technical skills and a service manual developed for the specific player and its Philips drive mechanism. If we adjust the spindle height to a level, were the two axis element of our laser mechanism is positioned in its neutral level again – we are done. Of course one day the plastic disc of the bearing will be completely worn out – and there is no chance to get a replacement part as far as I know – but I can assure you – the mechanism will work for another 15 years from now on – if we do not use the player as a burn in device – playing in continuously repeat mode for weeks or months;:)) In the service manual we will find a certain voltage and the points were we can measure it to adjust the platter hight – for that procedure a perfectly flat CD has to be used with some test signals on it (CD/R made by yourself). All in all, if you know how the procedere works, it is a job done in 20minutes. If you do a good cleaning (highly recommended), the whole work will need a little bit longer.

Recap:

P1050667

Another thing we have to deal with are all the electrolytics used in the player – not only in the drive compartment – I mean all the electrolytics, this is a job done with a lot of care and some patience. Today we have some great opportunities with modern designed caps. The SANYO OSCON electrolytics have a very temperature independent behaviour which is a very good thing with all the digital circuits and the drive mechanism. At other stages we can decide to use caps which we like because we think they give the unit a specific sound (Black Gates, Elna…) – and of  course we have the amazing Panasonic FC cabs, which is a strong recommendation for the power supply decoupling.

Sound experience:

P1050897

After the complete recap, we will be stunned, how such an old device will sound. The Marantz CD94 has maybe one of the smoothest treble performances of all CD players I know of – it is the opposite of what we will find in most modern players – the treble has a sort of creamy gestalt! This could be a good thing – because of 100 CD´s 98 are mastered with a very hot or aggressive treble – a circumstance which seems to characterise the digital sound, but which is more or less also a problem of the software itself. To explain this more in depth, I have to dig a little bit deeper – we have to talk about production techniques in the recording stage, mixing and mastering process. If you compare a modern digital workstation as AVID Pro Tool against a 24  Track 2″ tape recorder there is a huge difference – not only in the native sound of both units – more so in the style you are able to use them. With an analog recorder we have a certain limit with the frequency extremes. We cannot put the same amount of level on the tape in the extreme bass region as also in the treble region compared to the whole midband. If we do so – the tape machine has a surprise for us – or better two of them – noise or distortion. Lets say for a moment we want to produce a Hi Hat – and we want to have a sound with the highest amount of shimmer we can afford, there is a special technique to reach that. If we would put some EQ on the Hi Hat off the tape – after we already recorded that signal, we will boost tape hiss…. – if we put all the EQ to the Hi Hat before we record it – we will be punished with less gain possible to put on the tape – otherwise the signal will be distorted – and the result will be distortion or again tape hiss. So a mixture of both techniques is the goal – a little bit emphasis befor the signal hits the tape – and a little bit in the mix, were the signal comes off the tape. The keyword here is LITTLE!. In the digital world there is not such a limit…I am technically able to put 12db boost on a Hi Hat at about 12Khz – and there is no other punishment as my bleeding ears. Which brings me to the essence of that little example….if we engineers have no technical limits, it is up to us to decide what sounds good and what sounds bad. And with too much freedom, we will face a great risk to overdue it….In other words the analogue tape recorder is one of the biggest teachers for us recording engineers in the control room. Their limits give us a sort of certainty, which we all lost with the digital age! If you are sitting 10 hours or more behind the console, you loose the ability to judge the sound – but in the analogue domain we had some security implemented into the whole system, with digital everything is possible. And this is in my opinion one of the reasons, why with the upcoming digital technologie, we miss more and more a sort of natural sound – because all is possible and often some more treble in the mix seems to be more exciting….

P1050675

Now lets talk about the relationship between the producer, the artist and the recording engineer. It is a customer relationship – the producer wants a sound which competes with an international standard, the band wants a sound which is impressive and supports the idea of the song. Later on the mixing engineer will do the final work on a multi track session, often with more than 80 audio tracks implemented into the mix. Again the band and the producer wants to have the nearly finished product to be better than the reference recordings played back and forth during the mixing process. It has to be loud, powerful and impressive. So the mixing engineer will put a good amount of compression to the mix, as also a lot of EQ to make 80 tracks compatible to work with the basic idea of the song (a disaster!!!). Later on in the production process, the song hits a mastering studio – and again we have a customer relationship – the mastering engineer must bring the mix to a higher level – it is not “en vogue” to master the stuff in a natural way – it has to be louder than other comparable productions, it has to compete with the loudest tracks broadcasted at the radio. If the mastering engineer switches the mix file against the mastered version, all listeners in the mastering studio wanted to have this magic thrill – “Oh my gosh…..this sounds sooooo impressive”.

P1050896.jpg

At the end of that story we will have some music mastered on the CD which has at best 8db dynamic and we will face a frequency spectrum which boosts the extremes – a lot of shimmer, plenty of bass and a down shaped mid frequency spectrum – some tricks at the Flatcher/Munson frequencies and finished is another song which works perfectly in a car stereo system while driving on a highway at high speed – but listened to a good High End stereo system, we get bleeding ears – the music is boring – because no dynamic shades are anymore detectable – and we think – “Fuck digital”….but it is not the digital technology itself – it is the way we work with all the possibilities. If you have a chance to listen to Radiohead “In Rainbows” (for example) on CD, you will hear that it is possible to achieve something great, something outstanding even pressed on a CD, there is nearly no difference between the vinyl edition and the CD – and yes this album was recorded with an analogue tape machine…

Using the CD 94 as a dedicated drive:

P1050671

Coming back to the drive mechanism of the Marantz CD94 it is obvious, that this old machine will be a very good CD drive, maybe one of the best regardless of its price. If you want to skip the legendary DA converter implemented in this player – developed around one, if not the best 16bit ladder DAC the Philips TDA 1541chip set – you are in for a big surprise. But before “happy listening” we have to deal with the digital SPDIF (Sony – Philips – Digital – InterFace) interface which the engineers at Marantz implemented in this player to be able to communicate with external DA converters. You will detect a RCA jack at the back of the player – a thing, which most of the CD players have in common, regarding a SPDIF digital output. But this “standard” is wrong – completely wrong – because the SPDIF technology wants to “see” a proper 75 Ohm wave impedance. No RCA jack can deliver the proper specs implied in that technical standard – so we have to change the RCA connection to a proper BNC socket. And if we do that, we have to dig a little bit deeper. The Marantz CD 94 in it´s standard original configuration, gets its SPDIF signal from the Philips SAA 7220 digital Filter chip. The SPDIF signal is carried with the corresponding conductor path on the right hand side (mounted at the side of the chassis) daughter board and is further distributed by some connectors and cheap cabeling. So it is a good idea to grab the signal directly from the 7220 and use a dedicated 75 Ohm data-path together with a small circuit board, which brings the signal to the correct SPDIF specs – +/-0,5V and 75 Ohm wave impedance. Finally we feed the signal in our BNC connector and achieved a perfect SPDIF interface.

More modding:

P1050673

If you have tasted some blood now – there is even more, you can modify to reach the best performance – even if you just use the Marantz 94 as a dedicated CD drive. The Philips SAA 7220 is the biggest problem in the whole surrounding of the TDA 1541 DA converter and its signal flow. The reason for this is the HF dirt this chip delivers into the circuits of the whole player – this is more important if you use the player as a full function CD player – but also of some interests if you use just the drive mechanism. The Marantz CD94 was built at a much bigger budget, than one might think – but at some stage Philips/Marantz hat to cut down costs, because they wanted te player to be placed at the lower end of the High End player segment. At some parts of the player Marantz decided to drop the best solutions which were technical possible. One of this cut down areas is the power supply as also the delivery of the voltages to the different sections of that player.

First of all, the Marantz has just one power supply implemented – there is no seperation between digital circuits and analogue sections, as we will find them in Accuphase CD players of the same aera  (they were of course much more expensive). Accuphase used from the beginning of their CD player development on, always two separated power supplies, which facilitates them to isolate the digital path completely from the analogue path. Marantz opted for just one power tranformer / power supply. Why do we not modify an Accuphase player than??? – Because Accuphase used a Sony drive mechanism in those years and there is no hope to get any spare part for them anymore – and if we want to buy another player as a donor – the whole story would be very expensive – and last but not least – as good as the Sony drive mechanisms were, they found their master in the Philips CDM1 pro.

So we have to deal with the power distribution inside the Marantz CD 94. Our goal is to isolate as much as possible the SAA7220 from the rest of the player – to achieve that, we have to construct a dedicated rail only used by this chip. And if you are dealing with such an idea – built more than that single voltage regulator – because I know, that after reading Part II of this article, were I will dig deeper into the DA converter of this machine, you will use the Marantz not only as a very, very good CD drive…..;-)))

The original voltage regulators are placed at the heatsink, you will find on any TDA 1541 player, be it a Marantz, a Philips, Rotel, Naim and so on…. Now you know, why these players all share the same strange heat sink at the rear side of their chassis. The original player uses 3 regulators with this heat sink together – and we put another three into this machine. This gives us enough flexibility to modify also the analogue section of this player – but more important to give the SAA7229 beast its own rail with discrete voltage regulation.

The marriage with a high performance DA converter:

P1050900

If you use the Marantz CD 94 drive with an outboard DA converter using our modified SPDIF interface, you also have to get a proper SPDIF cable. It is not recommended to use a normal NF cable, which you normally use between your preamplifier and power amplifier – because a dedicated SPDIF cable has to be made with the 75 Ohm standard in mind. A very, very good choice is one of Chris Somovigos digital cables, he developed exactly for that purpose. In other words – this is one of the best options I know of. Be it a Stereovox, Stereolab or Black Cat 75 Ohm SPDIF cable – all are super performers – and you do not have to spent more money to achieve a better quality – these cables are of the highest class!

Now you have the choice to choose a DA converter you may have on top of your wish list. You can buy the newest and hottest stuff available to get the best of two worlds – the best drive mechanism ever made AND a ultra modern High End DA converter. One of the most exciting combinations will be a DCS Paganini if your speakers and the whole system is very neutral and not overly analytic. This combination is soooo good, that you will forget to play vinyl records for a long period of time. The combination is much better, than the integrated DCS Puccini CD/SACD player. The Marantz – do not ask me why, has a certain smooth sound, even if you use just the drive mechanism of the complete player. The sound of the drive is so grain free and elaborated at the treble spectrum – it is amazing – together with a very, very high resolution converter as the DCS Paganini is, you will get something which is hard to describe. If I have to characterise this specific digital sound to a moving coil cartridge, I would choose the Lyra Etna SL as an analogue opponent. A frightening resolution paired with a smoothness (used in a proper tonearm with a high quality SUT) and velvety gesture is apparent, a pinpoint accuracy which let you breathe the atmosphere of the recording event – fantastic!

If you use a pair of the legendary BBC LS3/5a monitors, the combination of the Marantz CD 94 drive with a DCS Paganini is not the best option. The LS3/5a has a slight treble rise – it is in that discipline the opposite to a well placed and integrated Quad ESL 57, which acts a little bit defensive at the highest frequency spectrum.  With the use of the BBC monitors a non oversampling tube DAC would be my first choice. And one of the finest options with a lot less money to spent as with the super expensive DCS stuff, will be the German manufacturer Acousticplan. The Digi Master  Tube DA – converter is a hell of a machine!!! If i should compare this combination with the analogue world of cartridges and turntables – I would go for the gestalt of a very nice Koetsu Rosewood Signature cart. A slightly recessed treble paired with a good punchy bass and the ability to layer the recorded space in a more integrated style. This combination is not analytic, it is about the tone, the beauty of the midband and the wholeness of the musical performance.

Stay tuned – part II of the Marantz CD 94 will come soon.

E. Strauss